


Going Live with MTN MoMo API in 2025: The Complete Developer Guide
Hi there! This is George S. Mulbah II, and in this blog, I'll walk you through the complete process of going live with the MTN MoMo API in 2025

Prerequisites and Application Process
The first thing after you apply for the API - in our case the products we need are Collection and Disbursement - the API credentials will be sent to your email. Then login to your partner dashboard.
Important Note: For each product, MTN has a separate dashboard. This means for Collection, MTN has a separate dashboard and for Disbursement, another dashboard.
Step-by-Step Integration Process
Step 1: Partner Dashboard Setup
After you login, follow the images to generate API user and key. The URL format looks like the below:
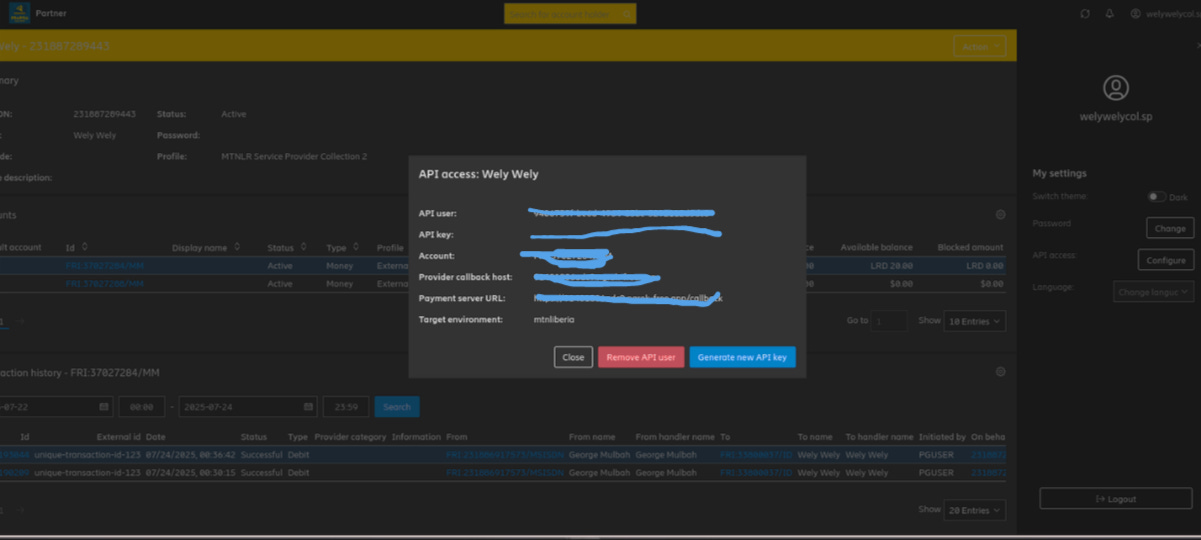
Provider Callback Host
2e79d8944407.ngrok-free.appPayment Server URL:
https://2e79d8944407.ngrok-free.app
Step 2: Backend Implementation
This is how you will set it up in your code that is if you where to do it via code
Request to Pay:
X-Callback-Url: https://2e79d8944407.ngrok-free.app/callbackBackend route to listen for Payment
POST("/callback")Step 3: Getting Your Subscription Key
After you generate the API user and API key from your partner dashboard, you must return back to your super admin account to get the Ocp-Apim-Subscription-Key.
Collection API Integration
For Collection, you have to generate the collection token then make a request to pay. Here's the complete process:
1. Generate Access Token
curl -X POST "https://proxy.momoapi.mtn.com/collection/token/" \
  -H "Content-Type: application/json" \
  -u "YOUR_API_USER_ID:YOUR_API_KEY" \
  -H "Ocp-Apim-Subscription-Key: YOUR_SUBSCRIPTION_KEY" \
  -H "X-Target-Environment: mtnliberia" \
  -d '{}'
Expected Response:
{
  "access_token": "eyJ0eXAiOiJKV1QiLCJhbGciOiJSMjU2In0...",
  "token_type": "access_token",
  "expires_in": 3600
}
2. Request to Pay
curl -X POST "https://proxy.momoapi.mtn.com/collection/v1_0/requesttopay" \
  -H "Content-Type: application/json" \
  -H "Authorization: Bearer YOUR_ACCESS_TOKEN_FROM_STEP_1" \
  -H "Ocp-Apim-Subscription-Key: YOUR_SUBSCRIPTION_KEY" \
  -H "X-Reference-Id: $(uuidgen)" \
  -H "X-Target-Environment: mtnliberia" \
  -H "X-Callback-Url: https://YOUR_NGROK_URL.ngrok-free.app/callback" \
  -d '{
    "amount": "10",
    "currency": "LRD",
    "externalId": "unique-transaction-id-123",
    "payer": {
      "partyIdType": "MSISDN",
      "partyId": "231XXXXXXXXX"
    },
    "payerMessage": "Payment for services",
    "payeeNote": "Thank you for your payment"
  }'
Disbursement API Integration
Important Security Requirement
For Disbursement, you have to ask your MoMo API services provider to whitelist your IP address. This is a critical security step that must be completed before you can successfully make disbursement requests.
1. Generate Disbursement Token
curl -X POST "https://proxy.momoapi.mtn.com/disbursement/token/" \
  -H "Content-Type: application/json" \
  -u "YOUR_DISBURSEMENT_API_USER_ID:YOUR_DISBURSEMENT_API_KEY" \
  -H "Ocp-Apim-Subscription-Key: YOUR_DISBURSEMENT_SUBSCRIPTION_KEY" \
  -H "X-Target-Environment: mtnliberia" \
  -d '{}'
2. Transfer Money (Disbursement)
curl -X POST "https://proxy.momoapi.mtn.com/disbursement/v1_0/transfer" \
  -H "Content-Type: application/json" \
  -H "Authorization: Bearer YOUR_DISBURSEMENT_ACCESS_TOKEN" \
  -H "Ocp-Apim-Subscription-Key: YOUR_DISBURSEMENT_SUBSCRIPTION_KEY" \
  -H "X-Reference-Id: $(uuidgen)" \
  -H "X-Target-Environment: mtnliberia" \
  -H "X-Callback-Url: https://YOUR_NGROK_URL.ngrok-free.app/disbursement-callback" \
  -d '{
    "amount": "100",
    "currency": "LRD",
    "externalId": "disbursement-transaction-456",
    "payee": {
      "partyIdType": "MSISDN",
      "partyId": "231XXXXXXXXX"
    },
    "payerMessage": "Salary payment",
    "payeeNote": "Monthly salary - January 2025"
  }'
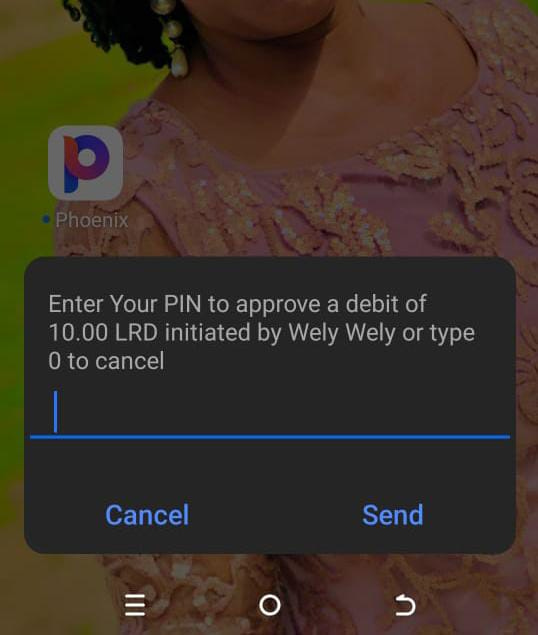
You Should recieve a prompt that look like this
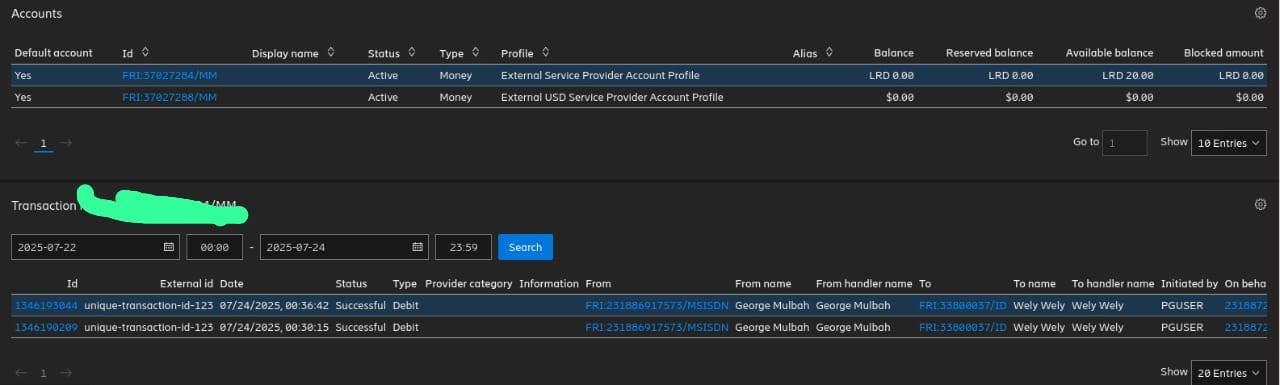
After Payment you should see the money in your momo partner dashbaord
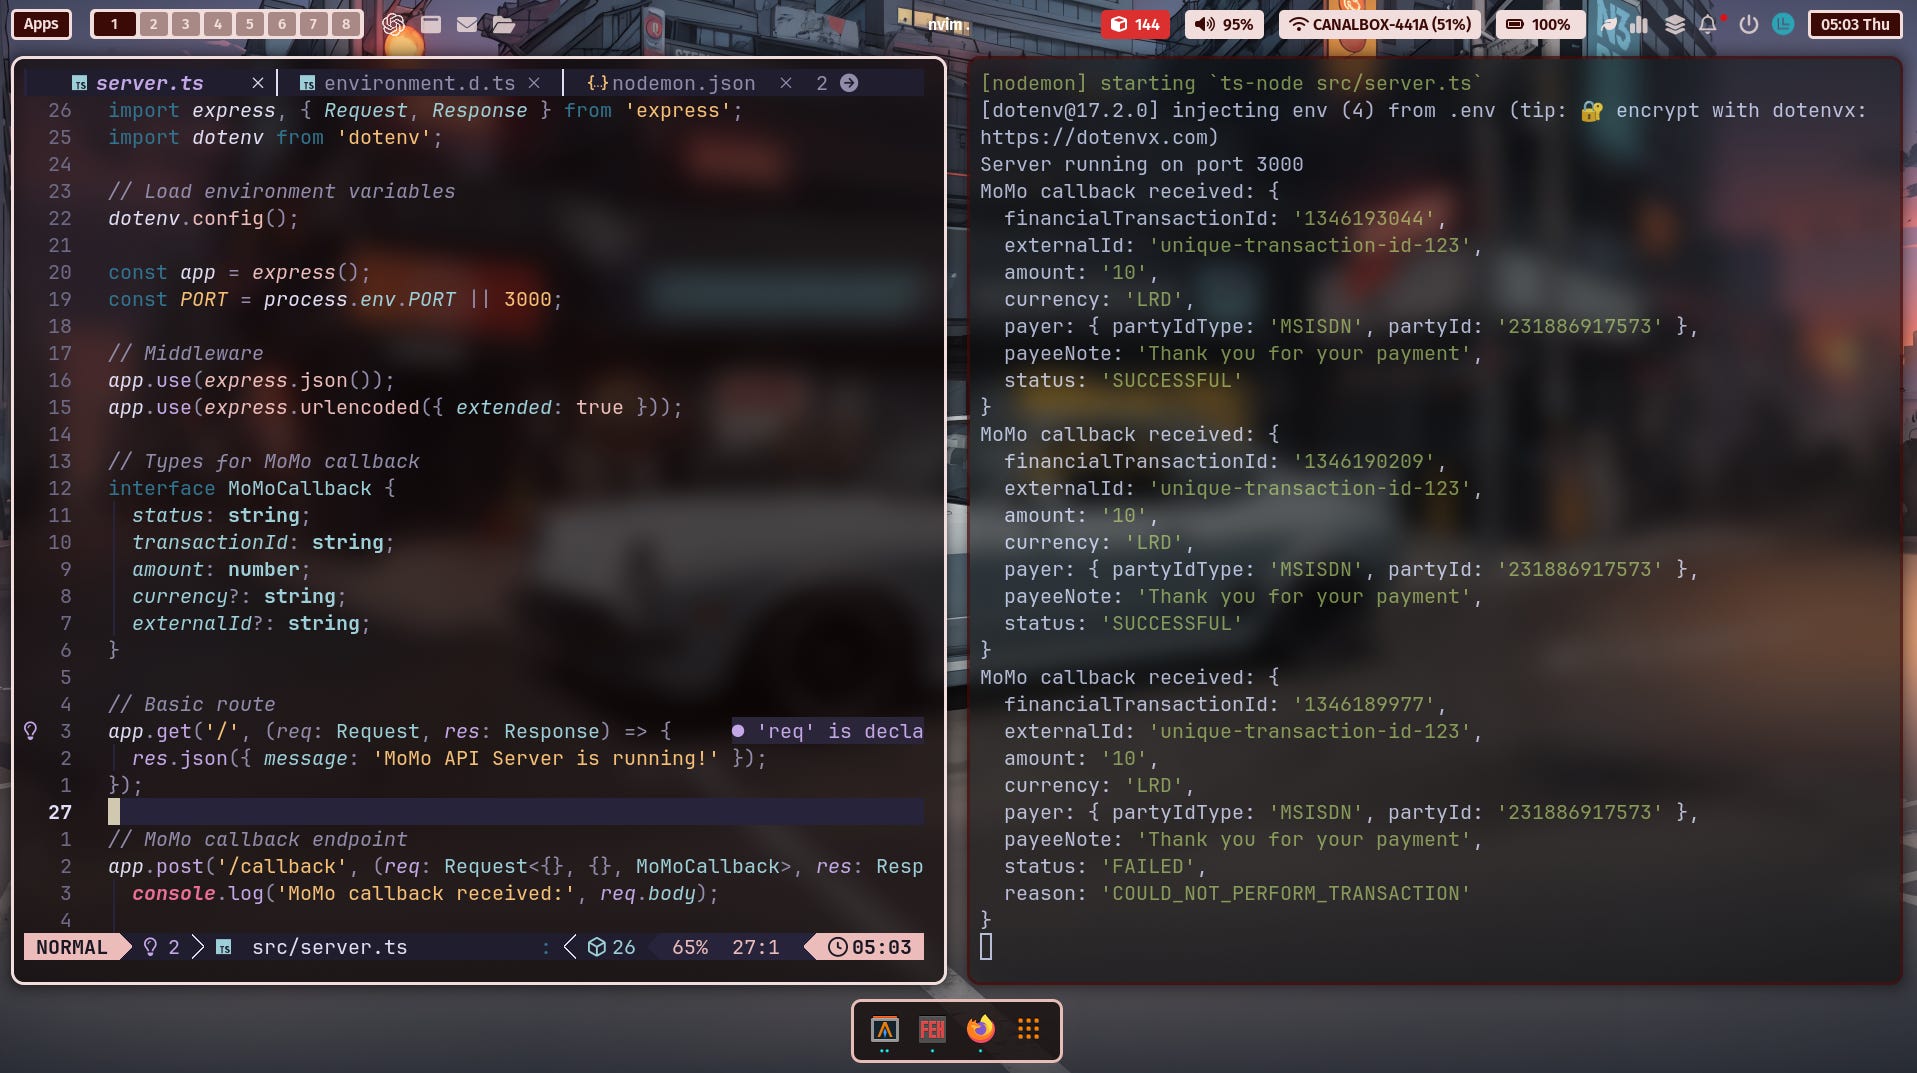
here is what the callback will received
also just incase you need the link to the above webhook callback code you can check find it on my github here wsay-momo